
My very good blogging friend, Jill, has asked me to do a tutorial on Triple embossing and while I do not claim to be any kind of expert and I am sure there are already many excellent tutorials out there on the web, I am more than happy to share how I do it.
Before I start, a few words of warning. Be very careful with the molten powder, it gets very hot so mind your fingers and as there is a lot of heating involved be sure to do it on a heat proof surface. I've warped so many craft mats in my time it's not funny anymore so I now use a cork mat which works well for me.
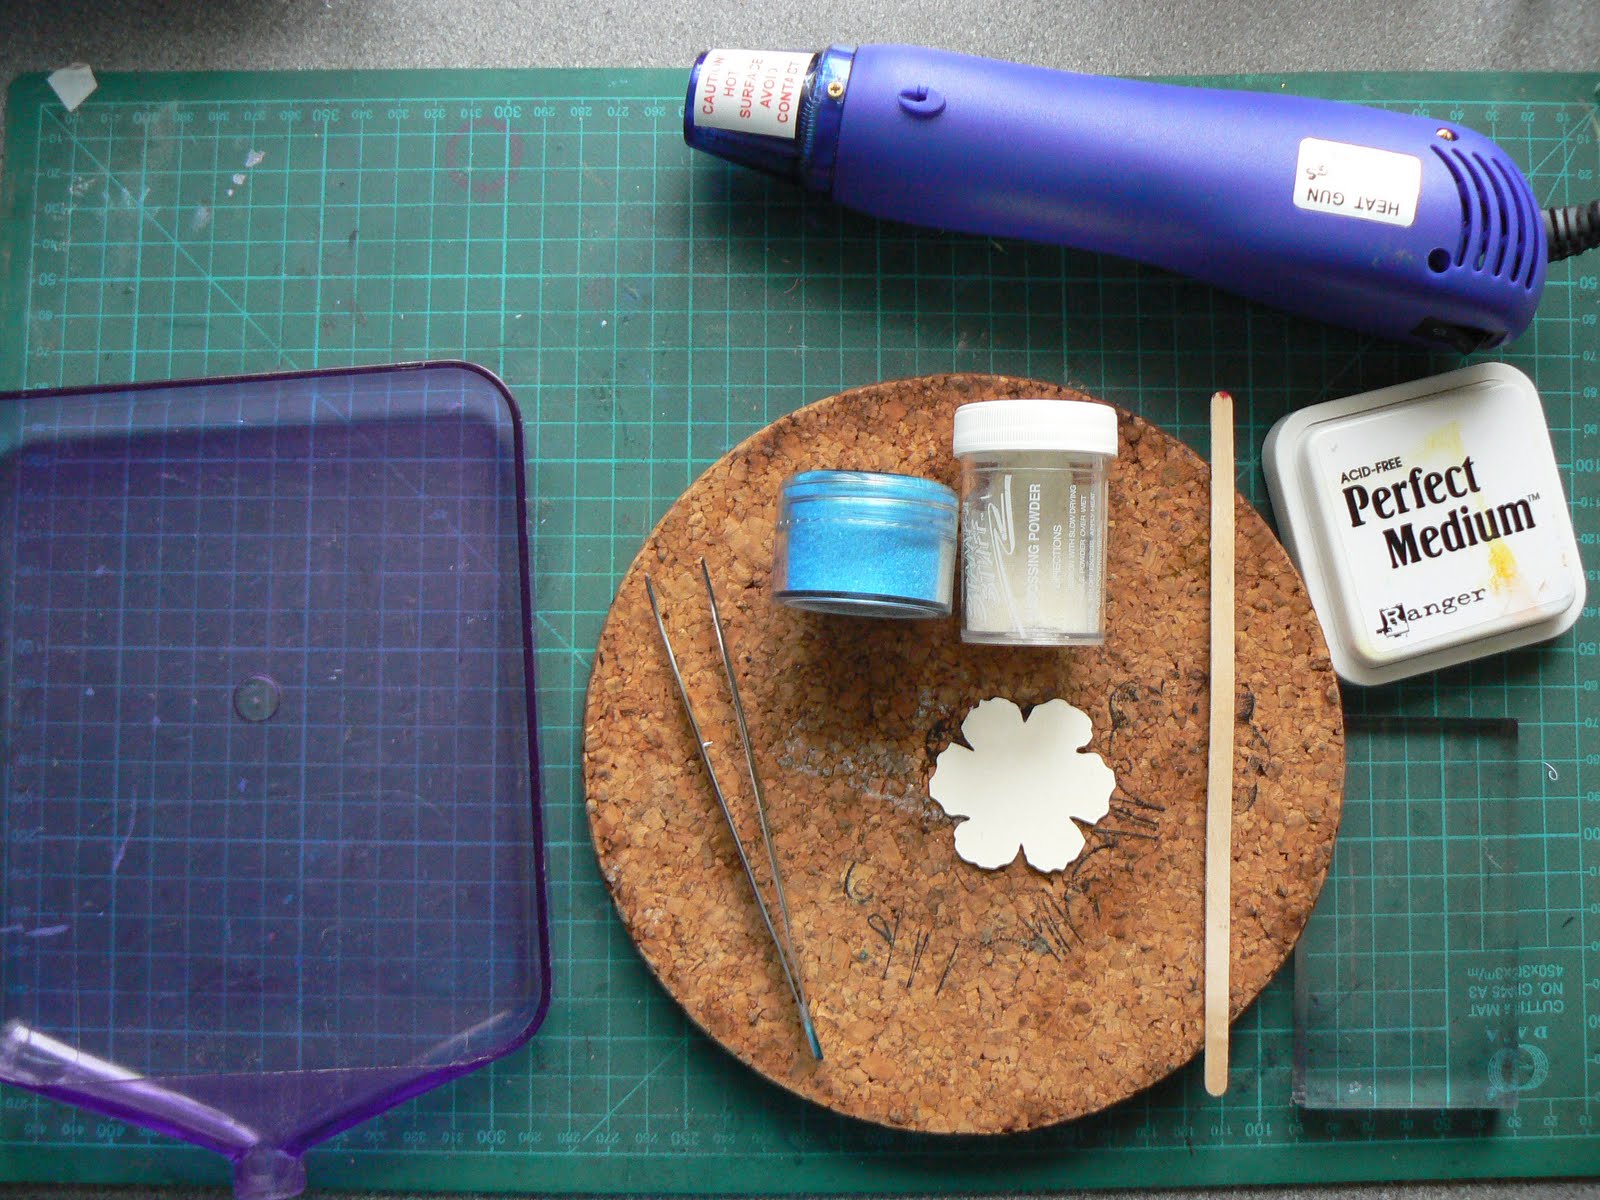
1) Choose something sturdy to emboss. A piece of chipboard or die cut a shape using cardboard. In the photos I die cut a tattered flower from a cereal packet.

2) Ink up your shape well with clear ink and dip it into your UTEE (Ultra Thick Embossing Powder). I tip it into a tidy tray.

3) Make sure your heat gun is hot and then heat the powder keeping your gun fairly close to your shape until the powder melts. You can hold you shape down with a wooden coffee stirrer if it moves about. If the powder flies off, either your gun is not hot enough before you start or you are holding it too far away.


4) Allow the shape to cool and then repeat the inking and heating process again. Your shape should now have a smooth clear glaze.

5) Change the clear UTEE for a coloured embossing powder. If you don't have UTEE, any embossing powder will work fine. Repeat the inking and heating process with the colour.


6) Before you ink and heat for the last time, ink up a stamp of your choice with the clear ink and leave close to hand. Choose a stamp with a fairly open pattern. NB. ONLY USE RUBBER STAMPS (this technique doesn't do acrylic stamps any good)

7) Ink, apply the powder and heat for the last time (be careful not to over heat or the molten powder will start to run off your shape) and immediately stamp into the liquid embossing and LEAVE for a few seconds to allow the powder to set slightly.

8) Remove the stamp and your triple embossing is complete. Trim the excess powder that melted beyond the shape to get a clean edge, it comes away easily with scissors.

9) You can leave your design as it is or I like to brush mica powder into the design to highlight it and then give a quick spray with cheap hairspray to set it.


10) The other alternative is to use a coloured ink on your stamp when you stamp into the hot powder, which gives another finish.

You can also try mixing your coloured embossing powders by spooning a small amount of each onto your shape and heating. Just experiment, play and have fun.

I hope this has been helpful and would love to see what you create if you have a go. Here is a card I made with my shape and a Stampin Up stamp and would like to send it to Jill if you can e-mail me your snail mail address.

Thanks for stopping by and I just have to say how delighted DD was at winning the Try It On Tuesday challenge last week with her manly tag. She is only 9 so you can imagine how excited she is.


.jpg)


12 comments:
Brilliant tutorial Lisa. Glad DD was pleased. Get in touch to arrange a guest designer spot
x Michelle
Great tutorial and beuatiful effects Lisa - thanks so much for sharing. Congrats to Freya - bet she was over the moon!
Hugs, Sylvia xxxx
Fabulous tutorial, thanks, Lisa - I'm going to have a go now. Elizabeth x
Great tutorial Lisa - really well explained with fab photos and trhe end product is gorgeous!
Appologies on my behalf for not realising it was your ever so tallented daughter that made the lovely boat tag - well done her! Cheers Claire x
Hi Lisa, Fabulous tutorial. I've never had the courage to have a go but will definitely have a try this weekend and will let you know how I get on.....
Lesley x
Wonderful tutorial Lisa! I was very impressed with Freya's tag. A worthy winner, I think!
Fab Lisa love your tutorial xxx
Hope you are well xx
love debbie xxx
Thank you for the great tutorial Lisa this has given me lots if ideas! That medallion card is stunning too. Have a great week. Tracey x
Who would have believed that beautiful embellishment started life as a cereal packet, it’s stunning.
I’ve not done any triple embossing for ages but you’ve inspired me have another go, so thanks for the tutorial.
As for trimmer………….it’s going back today, seeing as it’s been almost a week and Purple Cow haven’t even acknowledged my email, let alone come up with a solution. I definitely won’t buy anything of theirs again.
Sue
x
Hi Lisa
This is absoultely brilliant.
I learnt lots from this lovely tutorial .. .. thank you for sharing and inspiring me.
Love Jules xx
Brilliant tutorial and such beauty from a cereal box.
Sandra x
Great tutorial Lisa. Very clearly explained with excellent photos and that card is stunning. Such a fabulous colour and the lacy design is gorgeous.
Hugs
Lesley Xx
Post a Comment